

As a developer, you might well be familiar with Github and its myriad of uses.
Did you know, you can host your own personal website on GitHub for free?
If the answer is No please read along.
Hashnode bloggers are in for a surprise 😇
GitHub is a web-based version-control and collaboration platform for software developers.
Microsoft, the biggest single contributor to GitHub, initiated an acquisition of GitHub for $7.5 billion in June 2018. GitHub, which is delivered through a software-as-a-service (SaaS) business model, was started in 2008.
Git, an open-source code management system is a brainchild of a genius named Linus Torvalds.
Git, like other version control systems, manages and stores revisions of projects. Although it’s mostly used for code, Git could be used to manage any other type of file, such as Word documents or Final Cut projects. Think of it as a filing system for every draft of a document.
You can also build your own personal website on GitHub for free and Git will host it for you.
Prerequisites
First things first. You need to have an account on Github.
Create a GitHub account if you don't have one, sign up here
It takes a minute. This is where your website code is hosted for free.
It would be helpful to understand what Markdown is and how to write it.
Markdown is just a way to take a piece of text and format it to look a little nicer.
Note - If you started blogging on Hashnode then you already know the basics of markdown and its syntax - So it must be easy for you guys to pick from where you started to build your own pages
Please go through this simple tutorial to learn the basics of markdown
I am going to give you 2 options for building and hosting your own website.
The hard way 🤨
The highway 😜
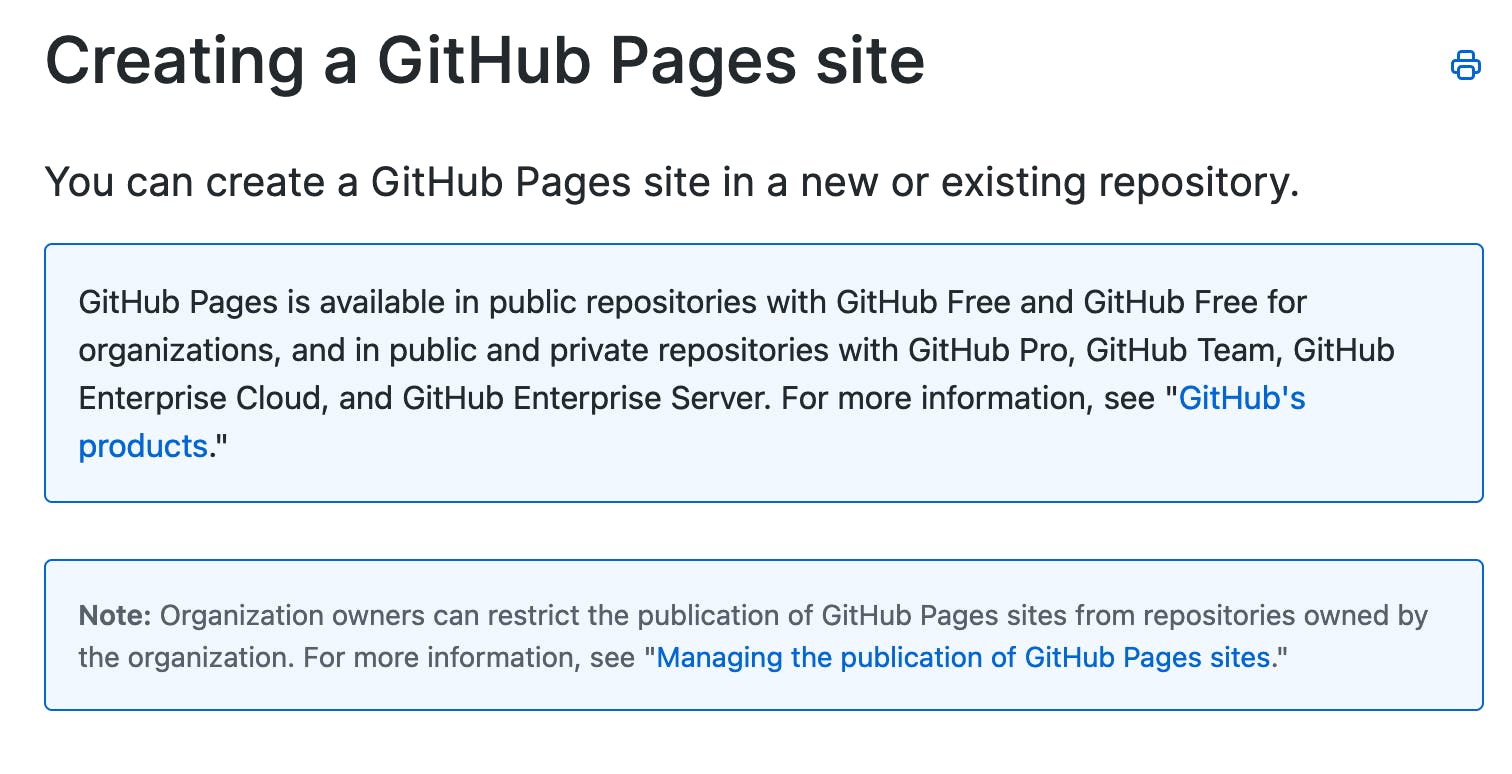
1. Github Pages - "The hard way"
You can use GitHub Pages to host a website about yourself, your organization, or your project directly from a GitHub repository.
GitHub Pages is a static site hosting service that takes HTML, CSS, and JavaScript files straight from a repository on GitHub optionally runs the files through a build process and publishes a website.
Head over to this page and follow the instructions.
Screenshot -
When I said the hard way I meant you have to do the reading 🤓, not that it is literally hard 🙄. We are developers, nothing is hard to figure out with the right guidance.
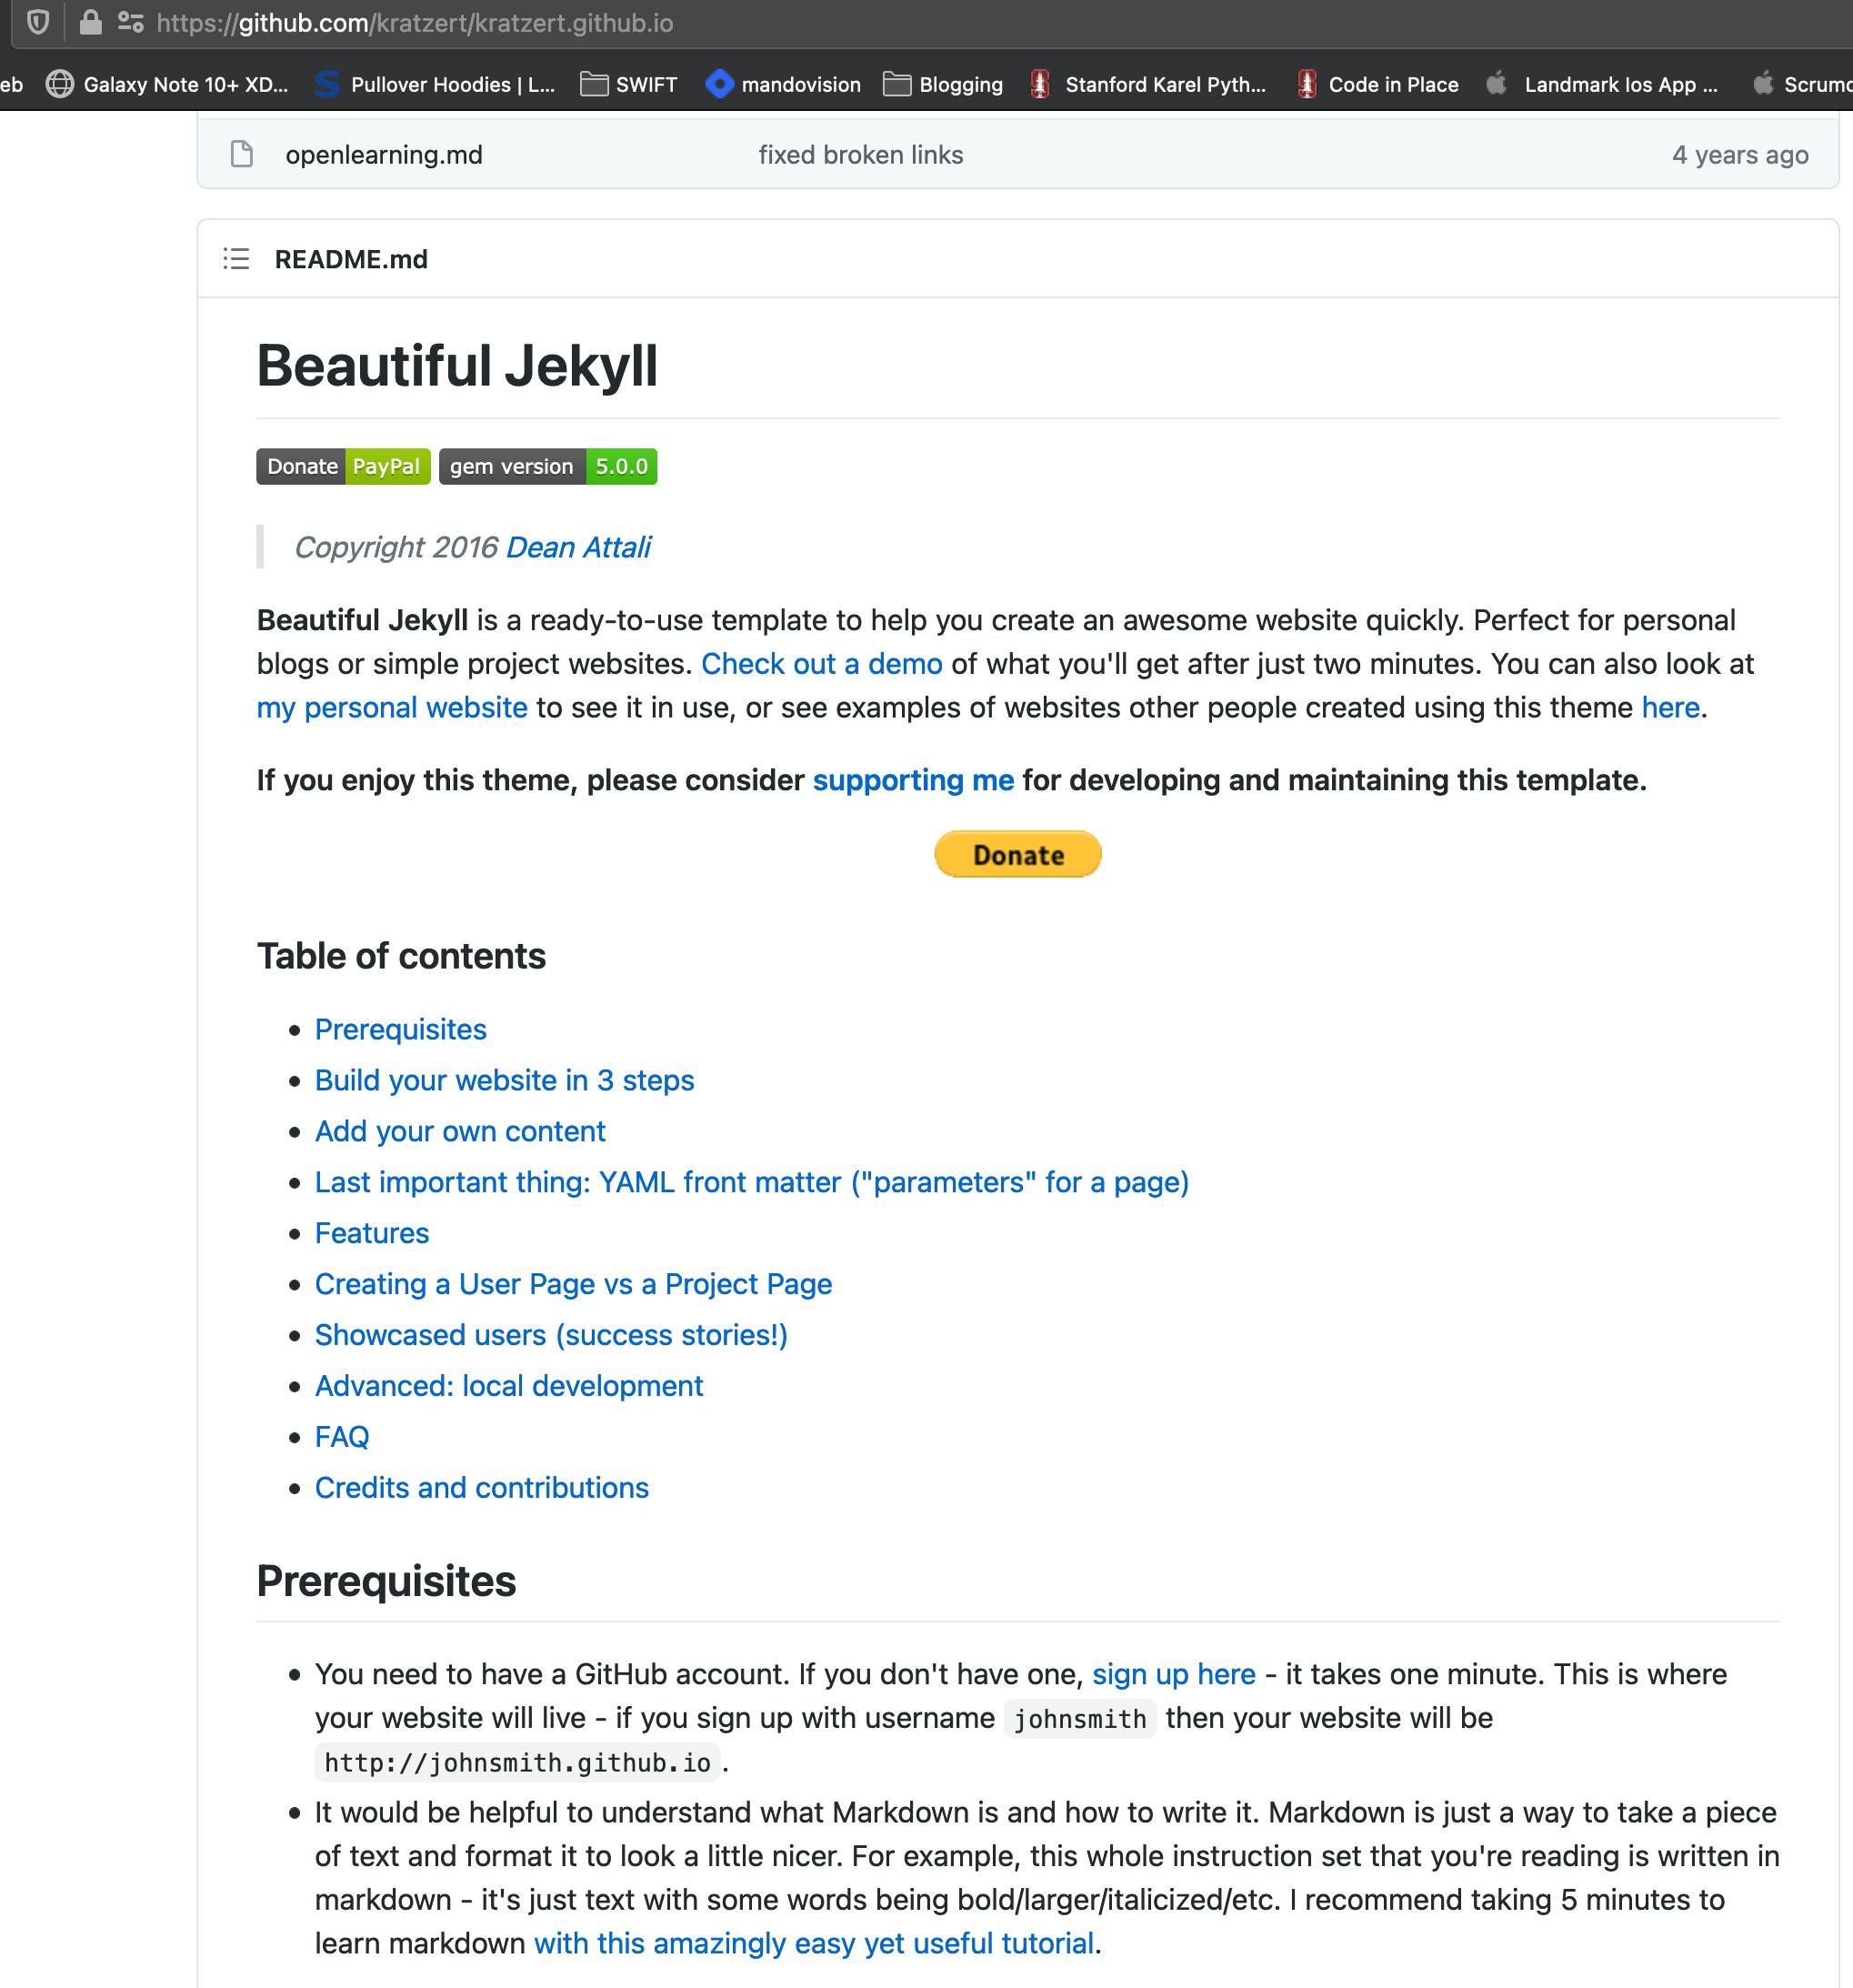
2. Beautiful Jekyll - "The highway"
Beautiful Jekyll is a ready-to-use template to help you create a website quickly. Perfect for personal blogs or simple project websites.
Plagiarism is the Sincerest Form of Flattery 🤗
Check out a demo of what you'll get after just two minutes.
You can also look at my personal website and if you like the changes I made you can fork my repository
Build your website in 3 steps
1. Fork this repository from GitHub
Fork this repository by clicking the Fork button on the top right corner.
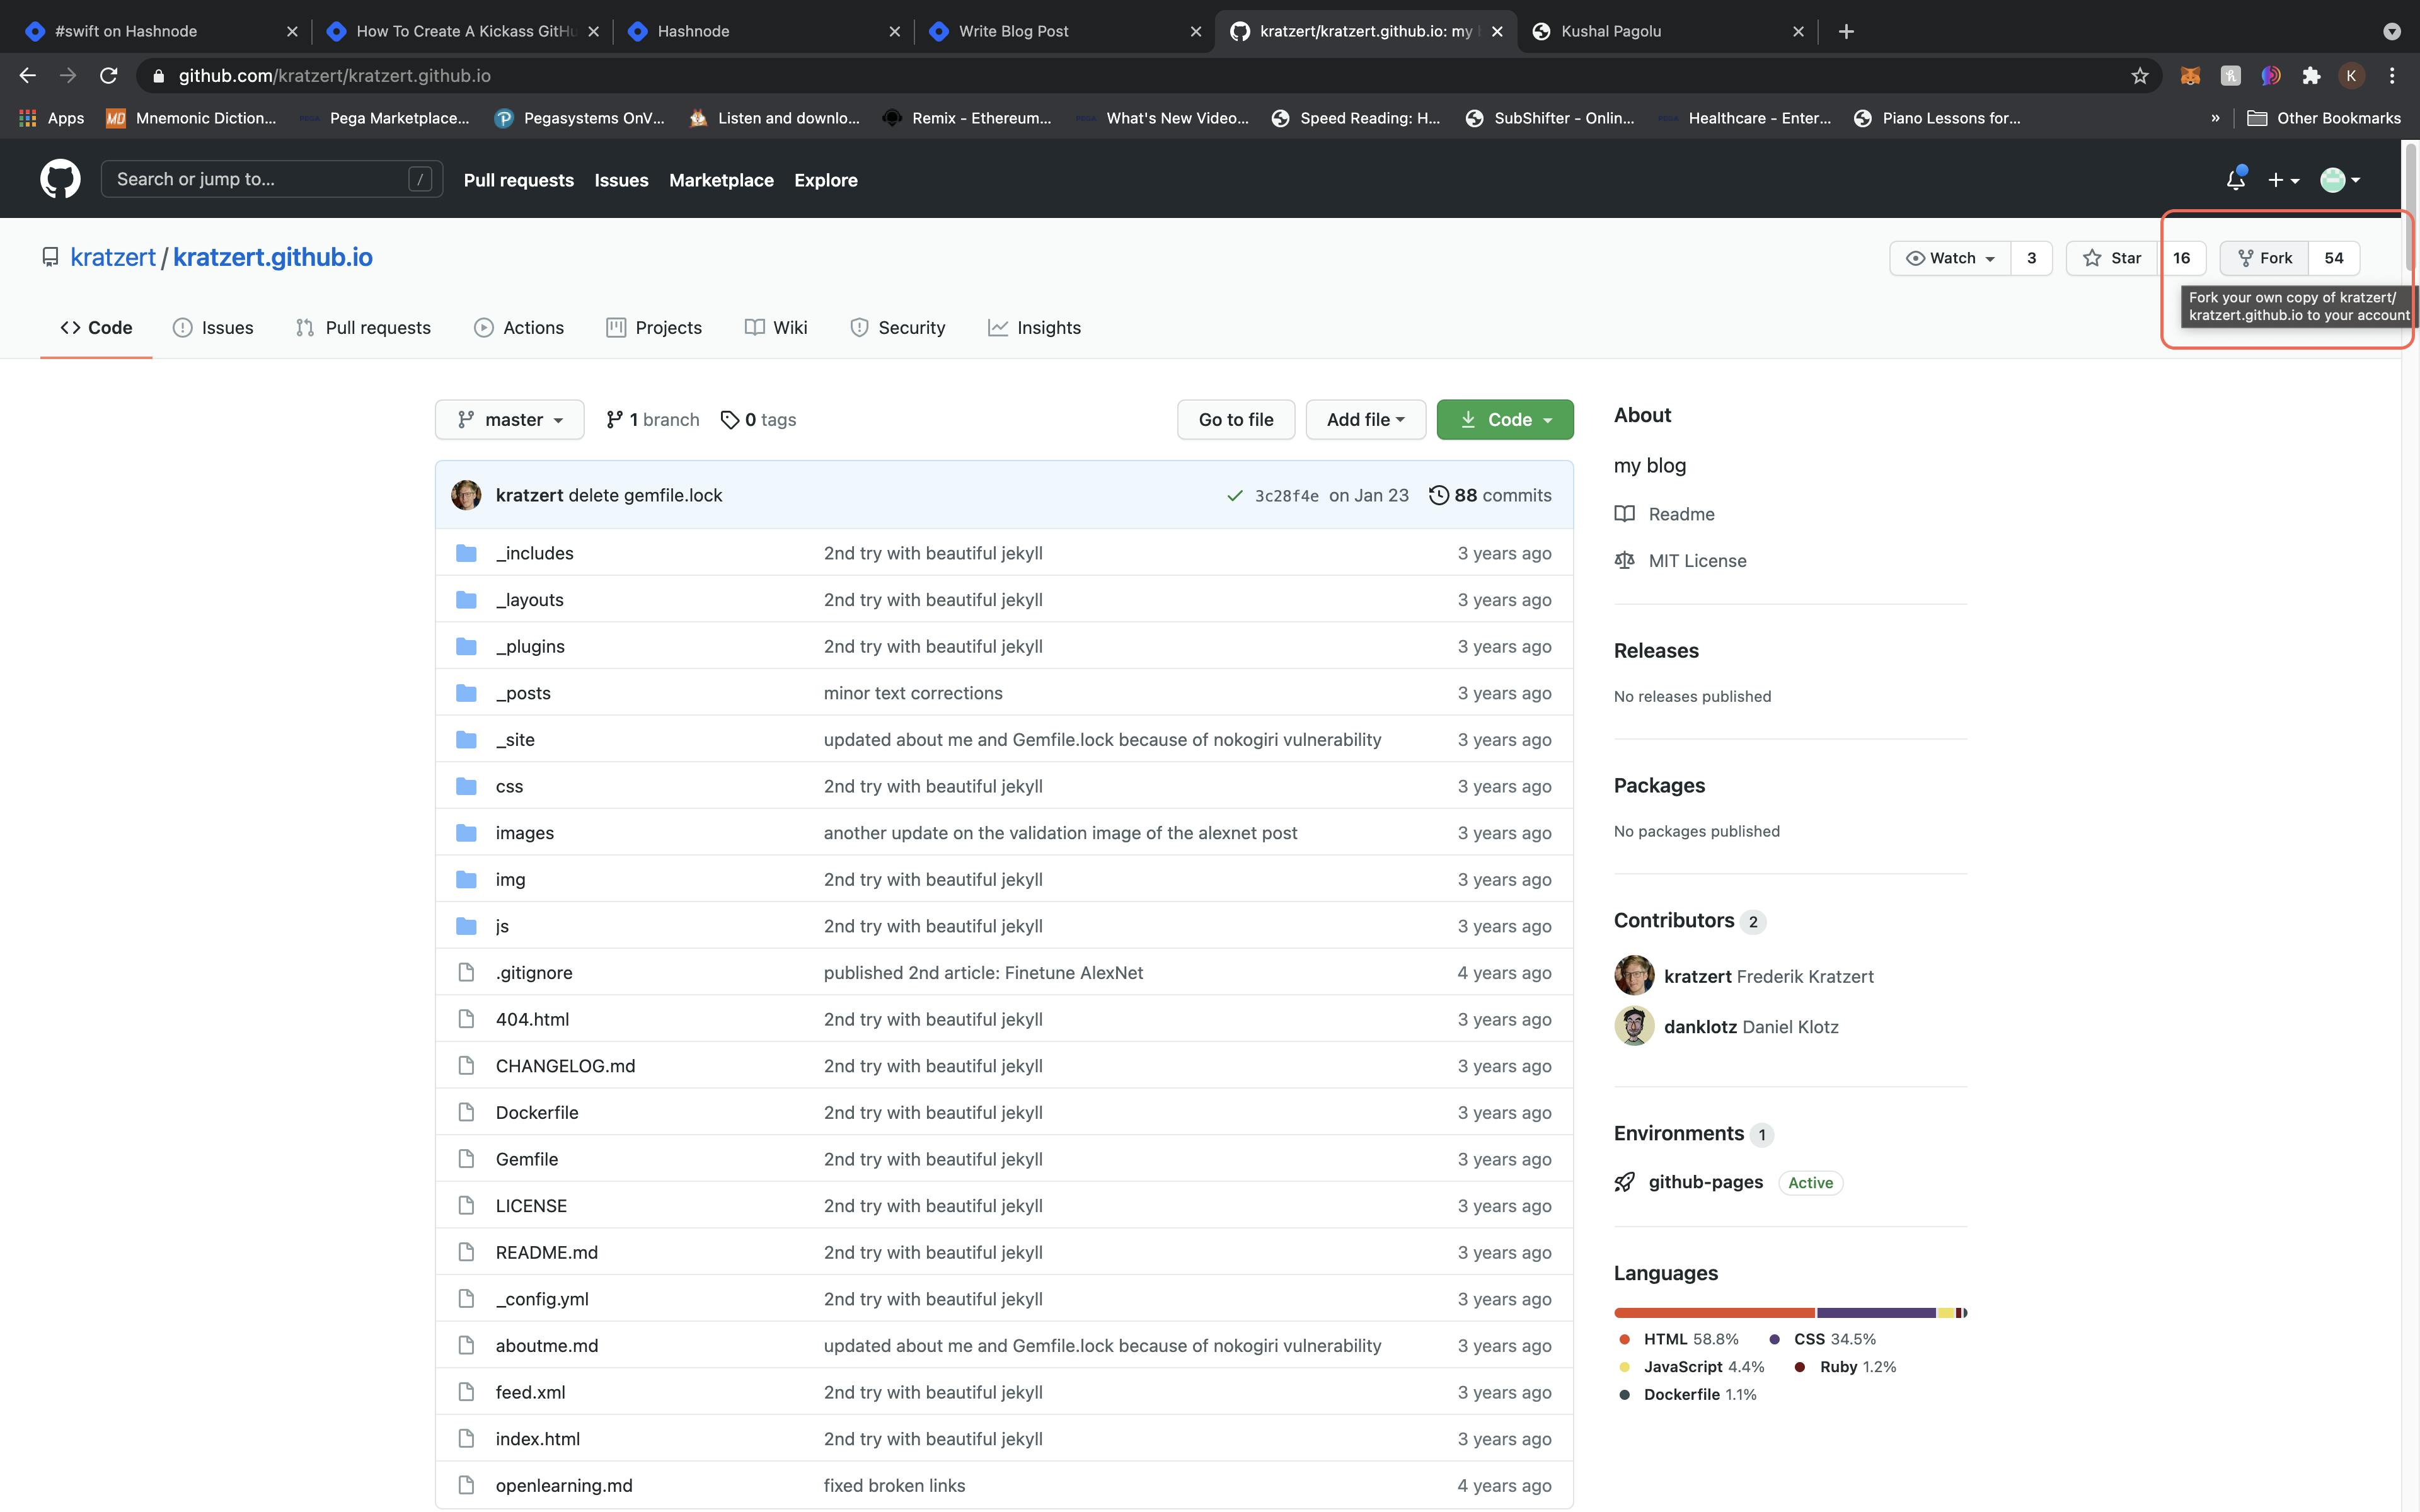
If you like the changes I made to my Github website. You can fork my repo instead.
Click Here to go to my repo and perform the fork step with it.
I made changes of my own. For starters I used index.md file instead of the default index.html from the Kratzer repository.
2. Rename the repository to yourusername.github.io
Once you fork your desired repo Settings tab is now available.
- Click on Settings at the top (the cog icon) and there you'll have an option to rename.
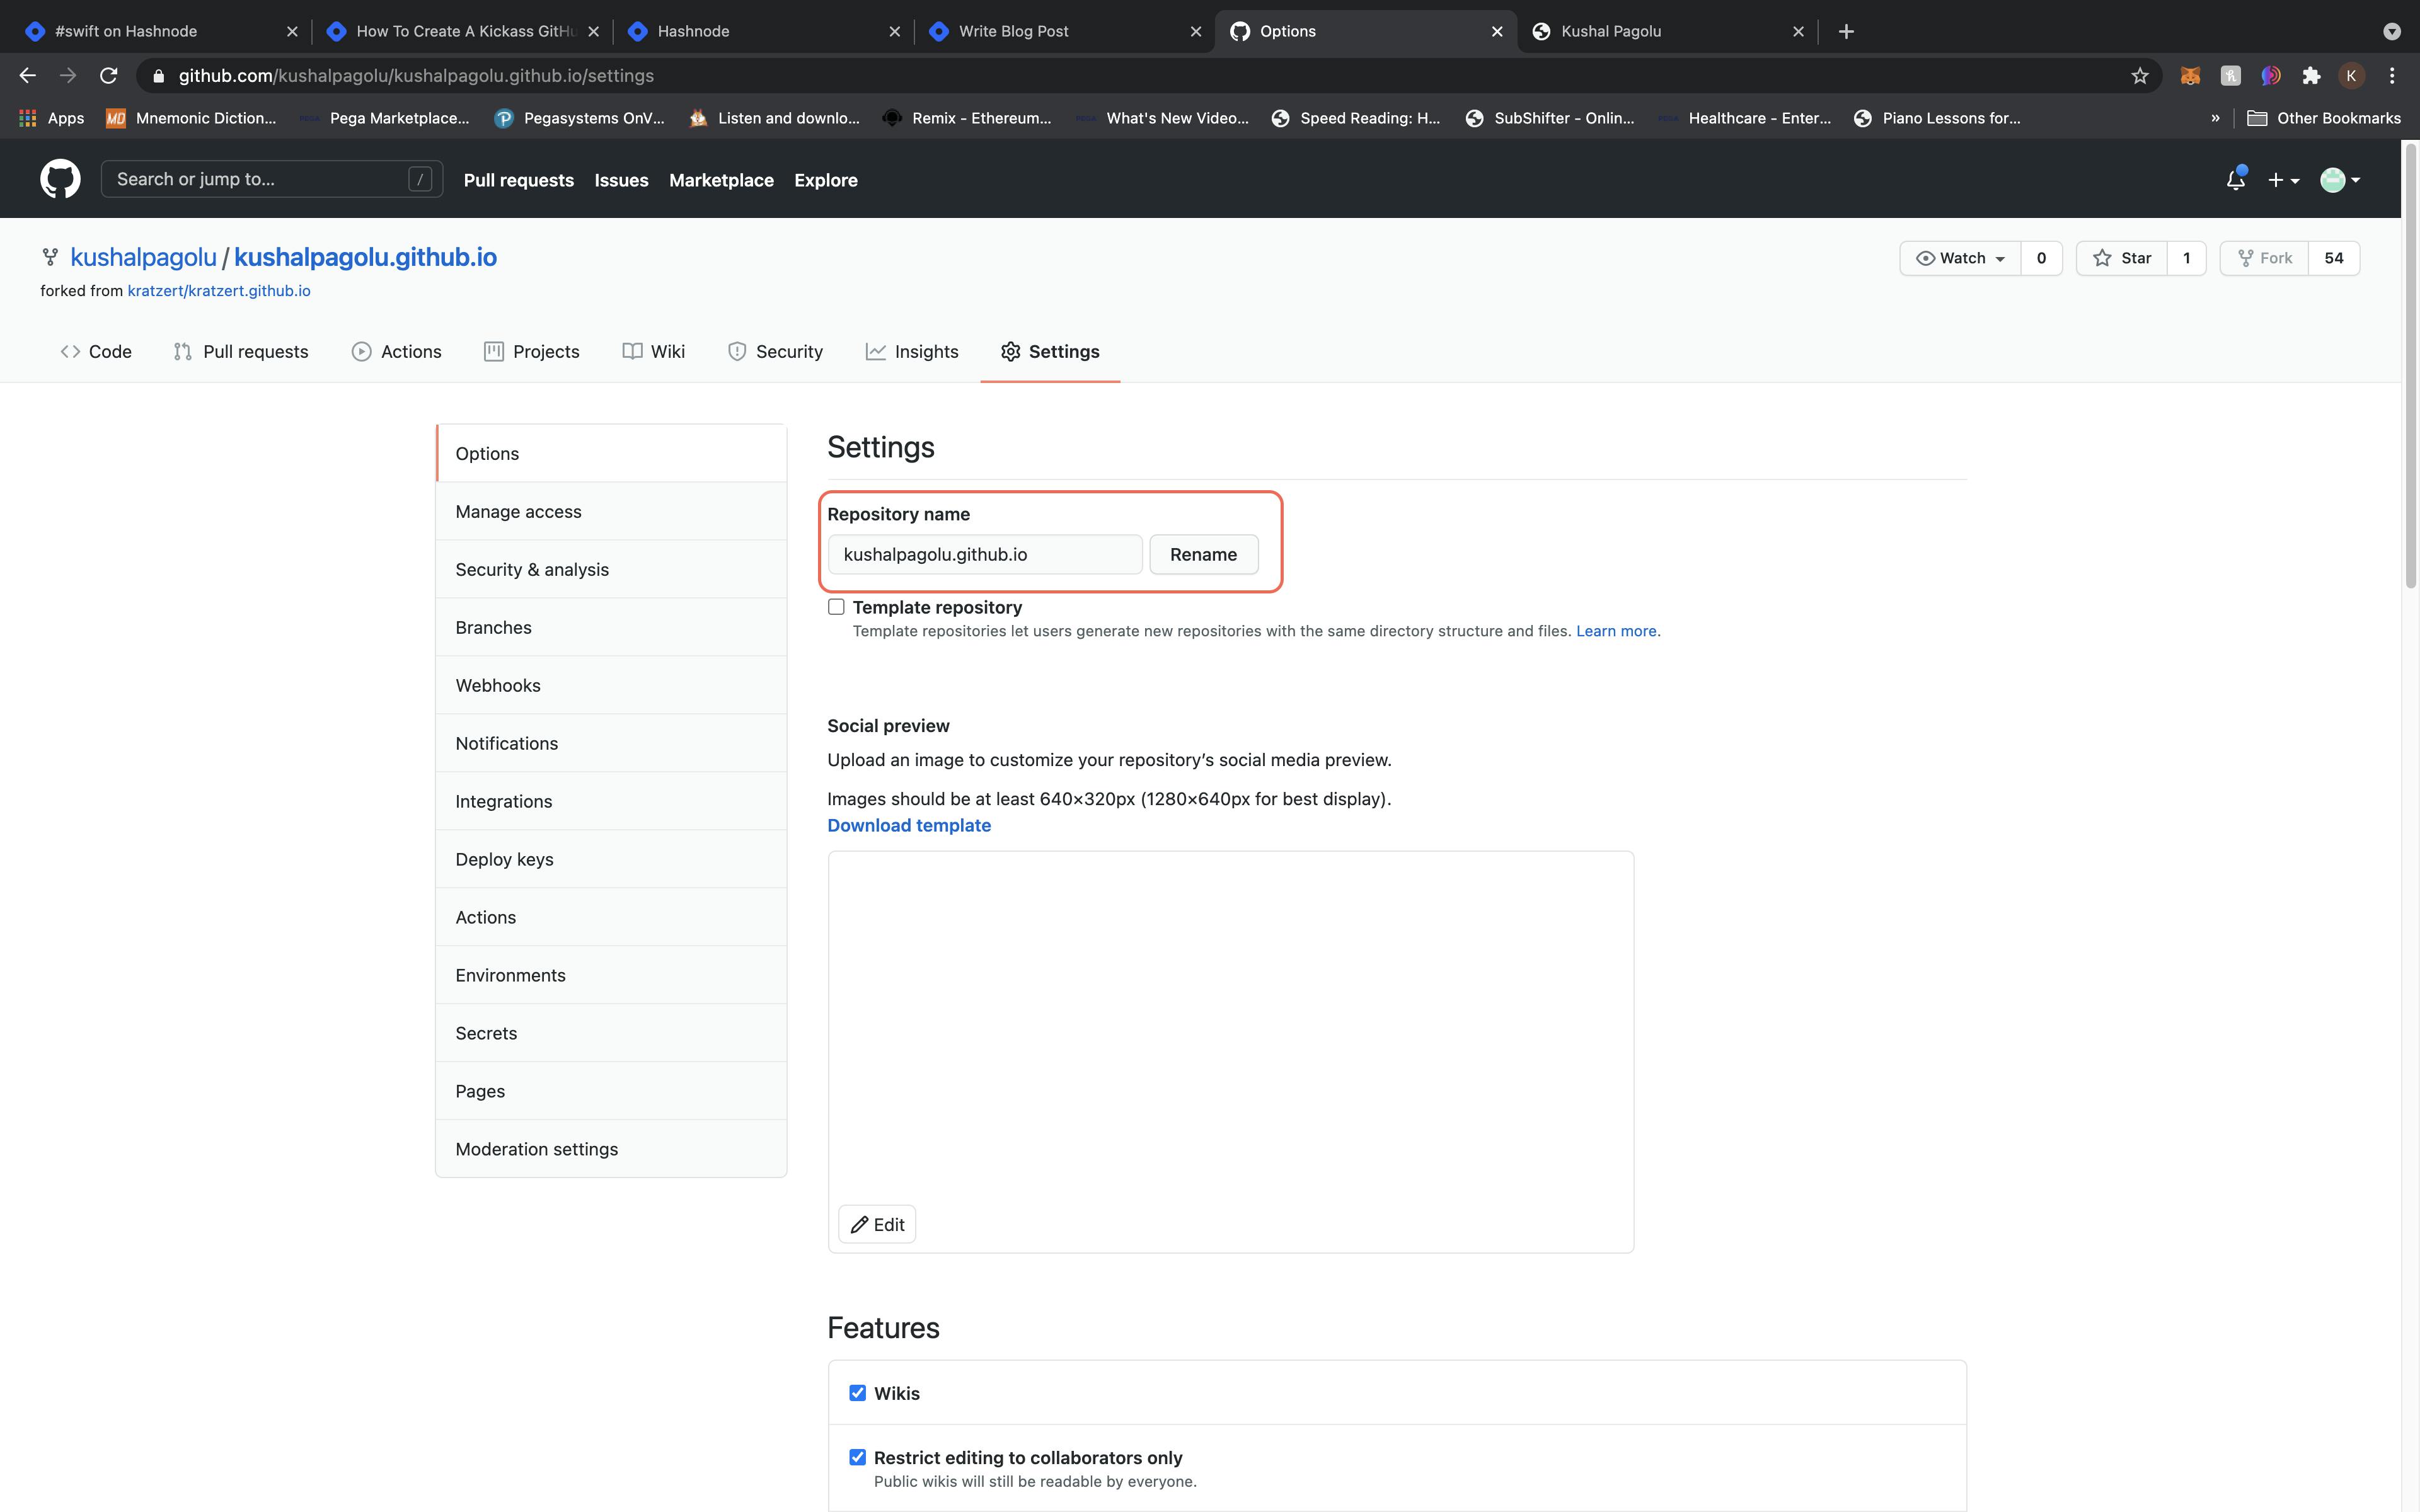
This will create a GitHub User page ready with the Beautiful Jekyll template that will be available at yourusername.github.io.
3. Customize your website settings
Edit the _config.yml file to change all the settings to reflect your site.
- To edit the file, click on it and then click on the pencil icon .
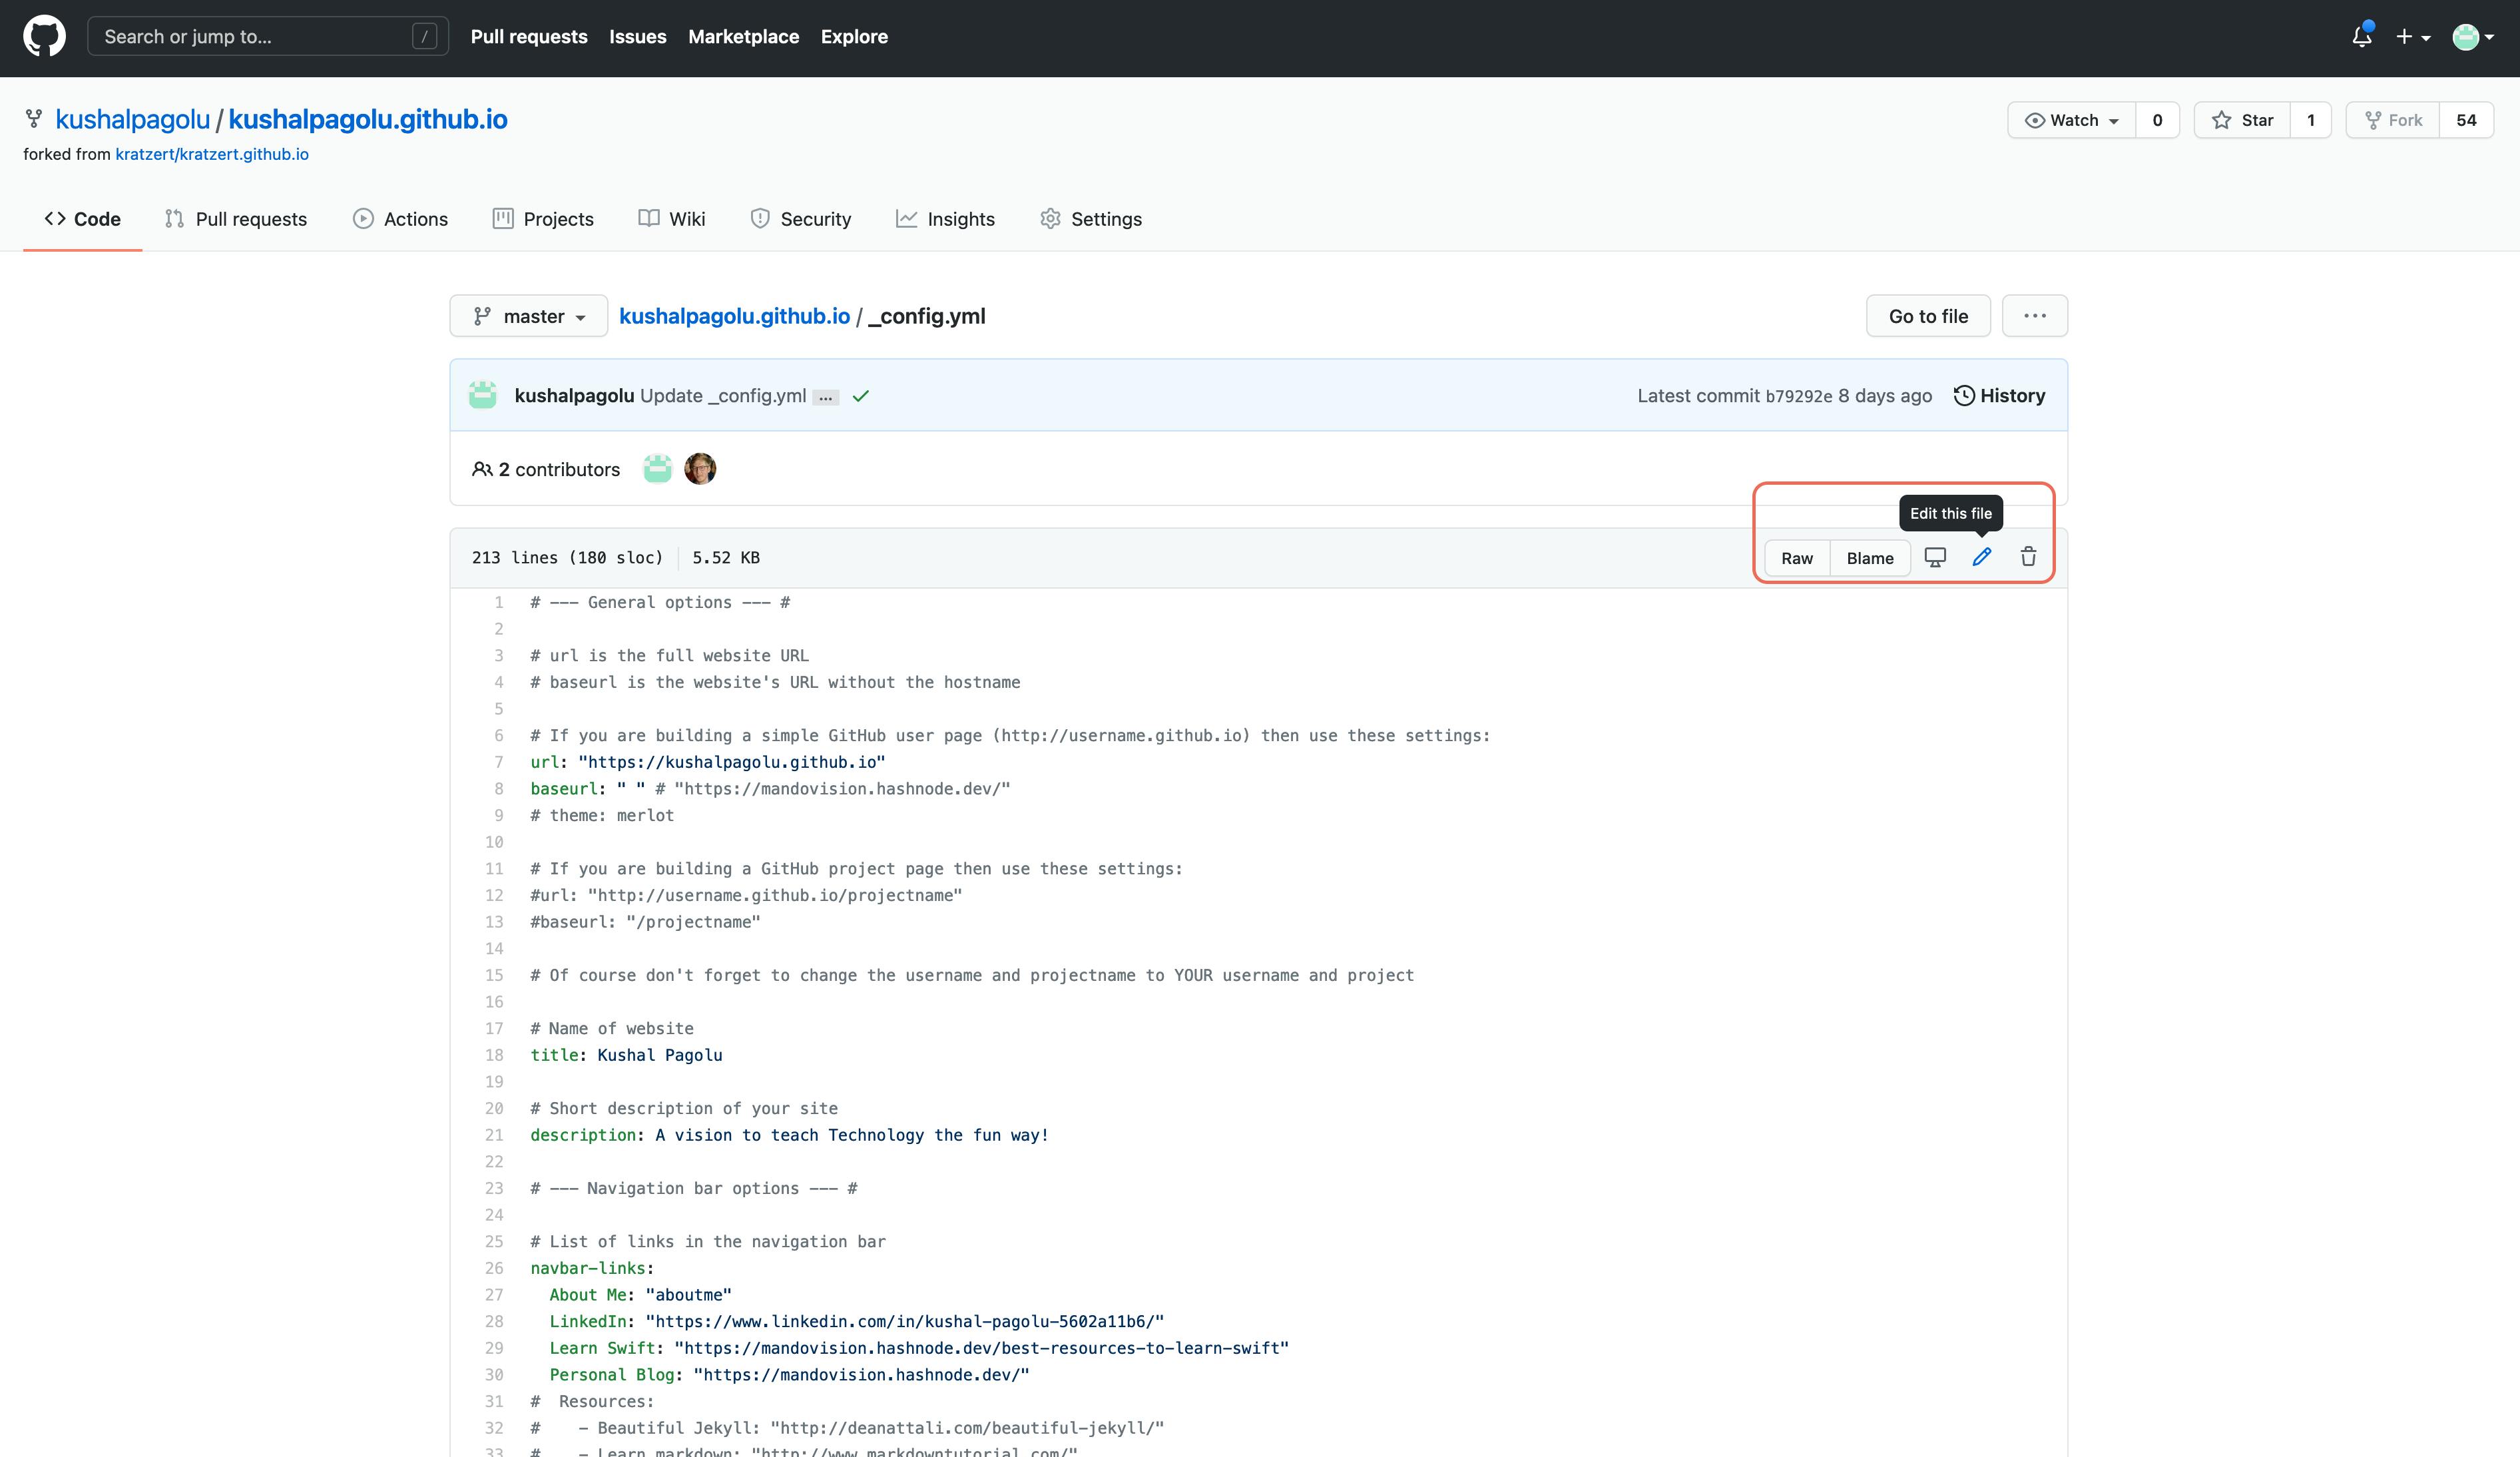
The settings in the file are self-explanatory and comments were added inside the file to help you further.
Any line that begins with a pound sign (
#) is a comment, and the rest of the lines are actual settings.
Note: If you like both the repo's then you can mix it by making minimal changes
Add your own content
To add pages to your site, you can either write a markdown file (.md) or you can write an HTML file.
You can look at some files on this site to get an idea of how to write markdown.
To look at existing files, click on any file that ends in .md, for example aboutme.md.
On the page, you can see some nicely formatted text (there is a word in bold, a link, bullet points), and if you click on the pencil icon to edit the file, you will see the markdown that generated the pretty text.
In contrast, look at index.html in Frederik Kratzert repo. That's how you write HTML. If you are good with HTML and CSS then you can make much better website.
Any file that you add inside the _posts directory will be treated as a blog entry. You can look at the existing files there to get an idea of how to write blog posts.
After you successfully add your own post, you can delete the existing files inside _posts to remove the sample posts, as they are just demo posts to help you learn.
Note: The blogposts from Hashnode can directly be copied into new .md files as they are already formatted in markdown.
Last important thing: YAML front matter ("parameters" for a page)
In order to have your new pages use this template and not just be plain pages, you need to add YAML front matter to the top of each page.
This is where you'll give each page some parameters that I made available, such as a title and subtitle. I'll go into more detail about what parameters are available later. If you don't want to use any parameters on your new page (this also means having no title), then use the empty YAML front matter:
---
---
If you want to use any parameters, write them between the two lines. For example, you can have this at the top of a page:
---
title: Contact me
subtitle: Here you'll find all the ways to get in touch with me
---
You can look at the top of aboutme.md or index.html as more examples.
Important takeaway: ALWAYS add the YAML front matter, which is two lines with three dashes, to EVERY page. If you have any parameters, they go between the two lines.
If you don't include YAML then your file will not use the template.
Features
All the below features are explained on the README.md file in the repo of Frederik Kratzert, the repo I used as a base from.
In fact, he did a much better job with a video and in-depth explanation of how to make your own website on his repository on the same file.
Screenshot
Mobile-first
Customizable
Allowing users to leave comments
Adding Google Analytics to track page views
Sharing blog posts on social media
RSS feed
Page types
YAML front matter parameters
Advanced features (including how to use a custom URL address for your site)
Creating a User Page vs a Project Page
Advanced: Local development using Docker
Credits
I am glad that I found this repo and used it for my website. I am learning new skills and making my website more beautiful. I am amazed at the simplicity of it. I was thrilled to know that GitHub supports markdown language and hashnode blogging taught me the basics of Markdown language.
The best part is the website looks more beautiful and professional on mobile.
I would like to thank Frederik Kratzert Twitter handle for the github repo.
Known limitations
- If you have a project page and you want a custom 404 page, you must have a custom domain. See help.github.com/articles/custom-404-pages. This means that if you have a regular User Page you can use the 404 page from this theme, but if it's a website for a specific repository, the 404 page will not be used.